

To add a treeview to a document library view, follow these steps:
- Browse to the view you want to add the treeview to. This must be a listview page (i.e. it won’t work on default .aspx or home.aspx).
- Edit the page in SharePoint Designer — then click Advanced Mode.
- Add a table to PlaceHolderMain with one row and two columns as shown below (NOTE:
” ”SharePoint doesn’t like these quotes. You need to change them all back to standard double-quotes" ".):<table style="width: 100%"> <tr valign="top"> <td width="20%"> </td> <td> </td> </tr> </table> - Move the existing Webpart Zone (the one that contains the view) and all its content to the second you just added.
- Add the following to the first you just added (the one whose width is 20%). Again make sure all the double-quotes get pasted properly!
<SharePoint:SPHierarchyDataSourceControl id="doclibDataSource" runat="server" RootContextObject="List" ShowFolderChildren="true" EnableViewState="false">
</SharePoint:SPHierarchyDataSourceControl>
<SharePoint:SPTreeView ID="doclibtreeview" runat="server" DataSourceID="doclibDataSource" EnableViewState="false" ExpandDepth="2" SelectedNodeStyle-CssClass="ms-tvselected">
</SharePoint:SPTreeView>
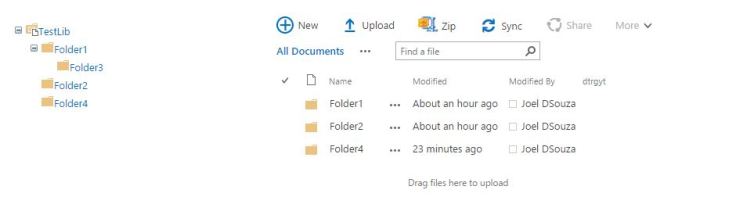
Save the page, and then view it in your browser
Reference link: http://www.nothingbutsharepoint.com/2012/10/22/add-a-treeview-to-a-document-library-using-sptreeview-and-sphierarchicaldatasource-aspx-2/

Recent Comments